Tuesday, June 21, 2011

Nine little piggies, aka steaklets

Today I'm going to make some small steaks, which I translated into steaklets in lack of better word.
I'm using some pork steakfillet, already marinaded by the manufacturer fine for my taste, so there won't be any special spice mixes in use today.
Raw, sliced and beaten meat
First I cut the meat to around two to three cm (that's around 1 inch give or take for you who use ridicilous imperial units instead of the sensible metric system) thick, which I then beat with bare fist to around 1 cm or so. I also added some seasalt at this point to make the flavour really come out (and according to some myths, tenderize the meat more, though since it'll be only couple minutes 'till it's being fried, I doubt it even could make any difference whatsoever).

Fried steaklets
Frying is quite trivial matter - take one cast iron frying pan, add hot enough stove (I had it on "5") under it and real butter to fry the meats on. I didn't take time how long it took the porks to cook ready, but if you're not certain is it done yet, just take one of the thicker ones, cut it a bit and see if it's still red inside or did the pig enjoy a good tan on the inside too, already.

Omnom, ready to eat
On the plate to accompany the beeflets I took the basic iceberg lettuce, bell pepper & cucumber -combo, today dressed in sweet dressing.

I added some of the chilimayonnaise I used last night on the salad for the steaklets, though in hindsight, they really didn't need it, they were really juicy little steaks without the sauce too.
One way or the other, it didn't really do any harm either, it fitted the pork flavour like a charm.

Sauce, bones and meat, aka bull barbeque ribs

I grabbed a set of bull barbeque ribs from the shop, and probably for the first time ever, I get to try these myself - usually the ribs I've eaten come from pork instead of the bull.
Raw meat :)
Cooking the ribs doesn't take much - of course it would be nice if I had a grill for these, but oven works too since it's not really grill-friendly weather out there, the sky looks like it's ready to rip apart and pour all the water down at once any second now.

Oiled ribs
The ribs had already been marinaded by the manufacturer, but I decided to drizzle them with some Smokey Hickory BBQ Oil anyway, in hopes to get some smokey flavor in there too. I set the oven to around 125 degrees celsius, as the manufacturer suggests - or at least I hope I did, since like I explained in earlier blogpost, it doesn't have any markings left on it anymore.

Why aren't you ready yet?
Around half of the couple hours cooking time I decided to take a peek into the oven as seen above - and damn was that a lucky shot! If I hadn't taken a peek, I wouldn't have noticed that the meat was looking like it might start to dry up any minute now on some spots despite the fact that I added the barbeque oil before putting them in. More oil for the meat!

A plate straight from the heavens?
Together with ribs I used some iceberg salad, fresh cucumber and bell pepper, which I dressed with selfmade chili-mayonnaise (I might return to that mayonnaise and how to make it some day, who knows)

Well, was it any good? Yes it was, though it pretty much required me to have seasalt nearby to add some after every two bites or so, without it the flavour was just a bit too stale or pale for my taste.
But despite that, maybe the photo under shows well enough was it good enough. :)

Naan, or there and back

Today in Uncle Kaotika's Kitchen we'll be using naan-bread, perhaps in a bit different manner than usually, though - instead of having the naan-bread as it is next to the food, we'll be putting fillings between 2 portions of the bread.

The bread I'm using is Santa Maria's Lemon & Sweet chili seasoned Naan-bread, and it'll be filled with striped/cubed chicken fillet steak (ready in fruity marinade), fried onions, bell pepper, pineapple, mandarine, cucumber and salad, of course not forgetting some cheese, garlicsalsa and whatever I might bump into while making 'em.
As usual, I use real butter for frying instead of the hippymargarines or some such. First, I fried the chicken fillet steaks seasoning them only with seasalt, and placed them to rest and cool while I prepare the rest.
Scorched onions & salad
The onions got thrown to butter drizzled pan, and like too often, they got scorched a bit too much - luckily that won't ruin their taste, though!

For the salad, I chopped up some iceberg (also known as crisphead) lettuce, yellow and red bell peppers as well as some fresh cucumber, and threw in one can of preseved mandarine slices (without the juice!) - the dressing won't be added before it's set on the plate.
Too thin to be sliced in half :(
I originally meant to fill the naan-breads like pitas, but sadly they're too thin to be sliced in half at least with my skills, or lack of skills anyway. As a quick replacing solution, I just cut the breads in 4 pieces and put the fillings between two slices.

Ready for the oven
First I spread some garlicsalsa on the lower bread, on which I put the chicken pieces and fried onions. On top goes the grated cheese (as with the previous pizza, I used Valio Oltermanni), and finished off with few pineapple pieces.
Right before the oven I put some small butter bits on top of the top bread to finish the delicacy.
Omnomnom, out from the oven
After.. let's say 5-10 mins in oven, I took the tops off each bread, and put in some salad, garlic dressing and bell pepper mayonnaise.
This goes in to your mouth, NOW!
The result was nothing short of fantastic, the bread had small kick from the chili but not enough to be called hot, the oven made the naan-bread nice and crispy but not too much so it would break into pieces on first touch.
The salad is nice and fresh with the mandarine slices bringing some sweetness to make it perfect.
Suosittelen lämpimästi kaikkia kokeilemaan!

Raiders of the best pizza - Part 1

Although this blog will (hopefully) include mostly low carb foods, pizza is my personal secret craving, and I simply can't resist making one every too often. What makes it even more sad is the fact that none of the low carb recipes for the dough come even close to real thing in my taste. Pizza aside, I'm sure there will be few foods coming which don't fit the strict low carb diets, but stepping aside from the trail only makes life more fun, so sit back and enjoy the ride.

For those who might want to try some of my foods yourself, I sadly can't give you exact recipes most of the time since I rarely measure anything, and go more on the gut feeling.

But now, to the food itself - finding the perfect pizza that is. One can't satisfy every different taste out there, but this is no doubt one of the most succesfull pizzas I've ever done myself.
The dough consisted total of around 5dl of cake- and plain wheat flour (yes, durum wheat would have been better but sadly I didn't have any at the time I made this), one sachet of dried yeast, fine seasalt fit to your preferences, pulverized black pepper and quite a lot of the spice mix I found recently - garlicy herbmix. The dough needed some 2 to 3 dl of water, and some extra virgin olive oil.

First, throw in the dry ingredients, including the spices, to a bowl and mix them. Then add the olive oil, quite a bit of it, I usually draw a spiral coming from the outsides towards the center of the bowl, and then some, for good measure. Add the water in small portions to ensure you get the texture you want for your dough.
The dough, after you let it rise for some 30min to an hour, will be enough for two full baking trays.

As toppings for this pizza reaching for perfection I used somewhat more exotic variants of my usual toppings - the pineapple was fresh, mettwurst and salami were from Hungary, thanks to friend couple who visited there recently. I suppose there's no way to make ground meat and onions exotic, but I think we can just forget about those and keep still say it's exotic. :)

I made the tomato sauce myself using one can of chilitomatomash, one can of garlictomatomash and about one can worth of Heinz Ketchup (the only brand I consider to be ketchup). I added some chilipowder, oregano and garlicy herbmix as well as black pepper and seasalt to the tomatomash and mixed them well.

I usually use Oltermanni (Finnish creamy cheese by Valio) since it's the cheese I use the most for other things too and usually have it ready in the fridge, but mozarella and emmental cheeses fit pizzas well, too.

Also, I used bell pepper, which I didn't remember to add 'till the pizza was already in the oven. :)

Chopping up the toppings, girlfriend attacking the pineapple
Preparing the toppings is perfect way to spend the time waiting for the dough to rise.
From the picture above I hope you get some sort of idea on how I chop up my toppings, mettwurst to strips, pineapple to cubes, salami to slices (either half or full slices). Frying the ground meat & onions probably isn't rocket science for anyone, so I doubt there's need to go much into it, let's just say I seasoned them with seasalt and used real butter instead of those hippymargarins and such, of course.

The dough & fried ground meat & onions
Once the dough has risen and toppings are prepared, it's time to roll the dough which I of course forgot to take a photo off, but I'm sure each and every one of you have done it anyway so you should be familiar on how to do it. I usually roll the dough straight on the baking paper (flour it first to avoid the dough sticking to it too tightly), so it's easier to see when it's perfectly sized for the baking tray.

Rolled the doug, spread the tomatosauce
After you're done spreading the tomatosauce all over the rolled dough, it's time to add the toppings. This is also the time when I usually realize I didn't prepare the toppings unless my girlfriend is around to help me remind about it (or do it herself). :)

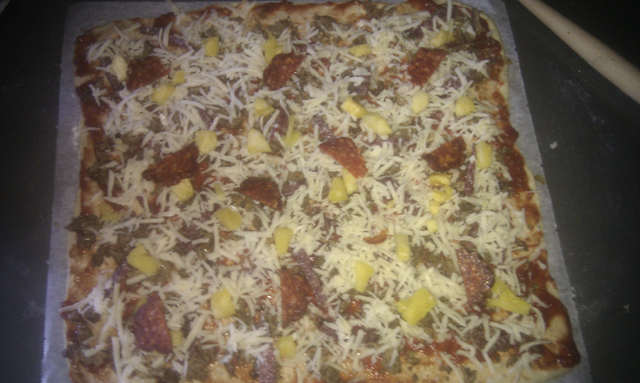
Toppings & cheese are on!
Done spreading the toppings, I have a habit of putting some under and some over the cheese - in this case, ground meat / onion mix went under together with mettwurst, while pineapplecubes and salamis (and eventually the bell peppers) went on top.

You should preheat your oven too, before getting the toppings on or even rolling the dough depending on how slow your oven is to heat up, so this is the point where I usually realize I didn't preheat the oven and try to figure out something to do while I wait for it to get ready.
I can't say much on the temperature of the oven, since my oven haven't had any temperature markings left for years, but I'd guess it was around 250-275 degrees celsius, or so.

Out from the oven, some with quick fingers managed to grab a slice before photo
Unusprisingly, I had (again) forgotten something, and added the bell pepper slices on top of the pizza after it had already been in oven for a minute or two even though they were supposed to be on it before it went in, but these things happen and don't really ruin the pizza.

The pizza is ready when the edges start to really get some color on them - for my taste, I rather take even few burned spots than undercooked pizza.

This particular pizza was no doubt one of the best pizzas I've ever made myself, but sadly the hungarian mettwursts and salamis are a bit too rare for me to get on regular basis, so can't try the same recipe too often.